Staying clean during a survival situation can be critical: the inability to properly wash your hands can transfer contamination and seriously affect your health! At some point, you might run out of handsoap.
Here’s a recipe from soapmaking expert Karla Moore that uses two ingredients to produce a very mild and usable cleansing bar!
by Karla Moore
Disclaimer: Don’t even think about starting soapmaking without the proper safety gear, and don’t make soap around small children! The lye used in the soapmaking process can seriously injure or kill you!
Soapmaking is a skill that is easily learned, and you can soon figure out how to make your own special blends.
But!
Don’t try to make soap unless you are willing to follow safety precautions!
Handmade soap can be really efficient and fun to make.
Use only containers and utensils made of stainless steel, heavy plastic or pyrex. Use absolutely nothing made of aluminum – lye reacts to the metal and that chemical interaction will completely ruin the soap and pan.
With this warning understood, here’s what you need to know:
Equipment needed:
- digital scale accurate to .1 oz. (1/10th oz.)
- thermometer
- large stainless steel pot to melt oils and mix soap in
- stainless steel slotted spoon or wooden spoon (that will never to be used for food again)
- rubber spatula
- 2 quart Rubbermaid or equivalent pitcher for mixing lye (Mark it plainly, so there is no way to mistake the contents for water!)
- small container to measure lye. ( A one-pound margarine tub, with a lid, works fine.)
- small stainless or glass container to measure optional fragrance
- plastic container or soap mold to pour soap in (Rubbermaid containers work great!)
- immersion (stick) blender or stainless steel whisk
Safety Gear:
- rubber gloves
- eye protection
- face mask to protect you from lye fumes
- old long-sleeved shirt and/or apron to protect clothes
It never hurts to have extra containers on hand to measure and weigh ingredients. Stainless steel is your friend – watch those garage sales!
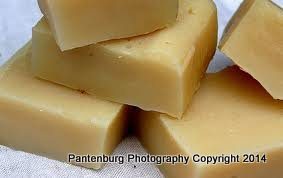
Soap Formula
Rendered Tallow or Lard 5 pounds
Sodium Hydroxide (lye) 10.5 oz.
Water 16 oz.
Every ingredient must be WEIGHED
1. Measure Sodium Hydroxide into small container observing safety rules for handling chemicals. This means using a mask, eye protection and rubber gloves.
2. Measure 16 oz. COLD Water into the lye pitcher. You may also use ice or ice/water mixture if shorter cooling time is desired. If using ice the mixture must be weighed.
3. Slowly add Sodium Hydroxide to the cold water. Stir gently and thoroughly until mixed. DO NOT BREATHE IN THE FUMES! Set aside to cool. When the lye/water solution is cool, it is very caustic, but looks like drinking water. In one documented instance, a person unknowingly drank lye solution, and died from it!

Then:
-
- Measure tallow into stainless steel pan. Set on low heat to melt. When melted, remove from heat source to cool.
- While the oils and lye water are cooling, measure out your fragrance oil (optional) and line your soap mold if desired. Clean & dry milk cartons make good molds. Just peel off the carton after the soap has set up for 24 hours. Remember DO NOT use anything aluminum!
Make sure to check and wear your safety equipment!
Check the temperature of the lye water and melted oils. They should be in a range from 100º- 115º
Now combine the ingredients to make soap!
-
- Slowly pour the lye water into the melted oils stirring constantly until combined. You may continue to hand stir if or, as I prefer, use a stick blender! Stick blend off and on until the mixture starts to thicken and leaves a wave after the blender. This is called trace: think of trace as a warm pudding- like texture. When stirred, it leaves a trail behind the spoon.
- Quickly stir in the fragrance and blend well.
- Pour into prepared mold and cover with a heavy towel to insulate.
Leave the raw soap undisturbed for 24-48 hours before removing from mold. After this time, it is safe to cut into bars and place in a well-ventilated area to cure and dry out. I recommend letting your soap cure for at least 3-4 weeks before using. The longer the bars cure, the better they will be. Water continuously evaporates off, leaving a harder bar that lasts longer in the shower. Handmade soap is at its best when it’s at least a month old.
Raw soap may be wiped out with paper towels and the pots and pans washed like normal. Wear rubber gloves when handwashing – new, raw soap is very caustic.
Coconut oil may be purchased from a grocery or Asian food store. It is used to pop popcorn and may come in a golden yellow color. This is perfectly fine to use and it lends a nice orange/yellow tinge to the finished product.
To buy sodium hydroxide (lye) look in the plumbing section of a hardware store. The container MUST say 100% Sodium Hydroxide and be dry flakes or granules, not liquid. If the material in the container has colored specks DO NOT USE! It contains heavy metals and is unsuitable for soap making.
Karla Moore
Karla Moore is a professional soaper, and started making soaps for her own personal use. She started her soap business in April, 2000. Karla has very sensitive skin and is allergic to the detergents used in most commercial soaps. Her experimentation, and earlier training as a cosmetologist, subsequently lead to a special line of soaps designed for people with allergies or similar skin conditions.
Karla specializes in soaps for people with allergies and also teaches soapmaking classes. She enjoys visiting with both beginner and experienced soapers.


Leave a Reply