Some of the most useful camping, survival and meat-cutting knives don’t come with sheaths. Here’s how to make a quick, safe edge guard/sheath out of a cardboard roll and duct tape.
by Leon Pantenburg
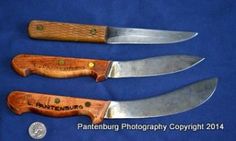
My knives are working tools, and the ones used in the kitchen frequently get double duty on camping trips or for meat processing. Some of these knives started out in a commercial cutlery catalog, were sold at a butcher supply store or were good deals at a gun show.
One memorable score was at a gun show, when a vendor was selling used boning knives for about $3 each. I bought several, and reshaped the blades to different lengths so I could experiment with the best length. (Turns out, I like a five-inch best!)
My best cutlery deal came from a butcher supply store in Nampa, Idaho. On a whim, I stopped in to look around, and found new, six-inch butcher knives being sold for $2 each. The handles were wood, and had recently been outlawed by the health department. I bought a dozen, (and still regret not buying another dozen!) and presented them to my hunting buddies. Many of those knives ended up in hunting camp wearing the cardboard tube/duct tape sheaths!
A prepper and/or survivalist can see the advantage of a knife that is usable for a variety of outdoor tasks. So suppose you get a good deal on a one-piece knife and want to take it to hunting camp. For safety sake, that blade needs to be securely covered.
Here’s how to make a quick, safe sheath that will last until you come up with a permanent replacement.
Materials needed are the cardboard tube from inside a roll of paper towels; duct tape, a six-to-eight-inch piece of paracord and a piece of leather or webbing for a belt loop.
Here’s what you do:
- Measure the blade length against the tube, and make sure that every part of the sharp edge will be covered.
- Flatten the tube under a pile of books or something heavy, until the cardboard remains semi-flat. Then, take a piece of duct tape and tape across one end, to help hold the shape.
- Wrap the length of the tube once with duct tape.
- Double over the webbing or leather to form a belt loop, then tape it securely to the back of the tube.
- Wrap the sheath with duct tape again to secure the belt loop. (I carry duct tape on my knife sheaths anyway, so put on a few extra feet!)
- Take the paracord, run it through the belt loop and use it as a safety tie for the handle.
Of course, you could always buy a knife blade protector, but preppers and survivalist-types tend to be hardcore recyclers and do-it-yourselfers. Besides, the cardboard tube project takes so little time and is so cheap , you can soon make a sheath for all your knives!
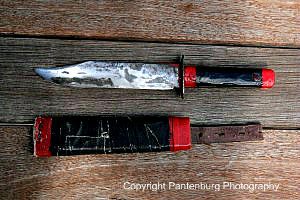
I made this knife and cardboard sheath 50 years ago.
My practice is to keep an eye out at gun shows, and buy any leather sheaths that might fit something I own. Over the years, all but one of my hasty sheaths has been replaced with solid, well-fitting leather or nylon sheaths.
My best score in that area was when I bought a leather Bowie knife sheath for a couple of bucks. One of my elk hunting partners, Phil Walker, carries a real Bowie knife elk hunting, and his knife carrier showed the wear and hard use. That scavenged sheath fit his knife like it was made to order.
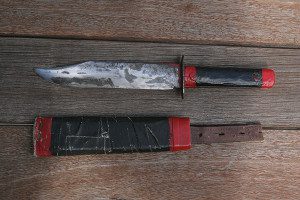
One knife I own, though will never have a sheath replacement. I made my first knife as a 14-year-old, grinding the blade to shape on an antique pedal-powered grinder. The handle is made of wood. Lacking the right leather at the time, the sheath was made of cardboard and tape. I used the same technique as mentioned above, except an old leather belt was used for the loop. I always intended to make a real sheath out of leather, but never got around to it.
That knife was carried for years in that cardboard sheath , and it worked just fine. So, I guess there is probably no reason to replace it now!
Please click here to check out and subscribe to the SurvivalCommonSense.com YouTube channel – thanks!
For more information about survival and backcountry knives, click here!



Leave a Reply