
How will you pitch a tarp so it can handle really nasty weather? Here’s what to do.
by Robert A. Patterson
In June of 2016 I went with a friend to the Boundary Waters Canoe Area for six days of camping, canoeing and fishing. After arriving at our second day’s campsite, and making a run to fill up the water bladder, the wind started to blow. It came up steadily and consistently until it was blowing 30-40 mph.
Over the next three days it blew consistently at 30-40 mph. The gusts must have been 40-50+mph at times. It kept us camp bound for three days.
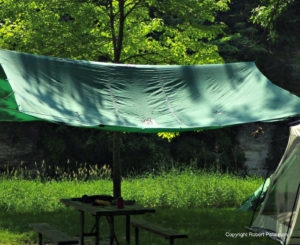
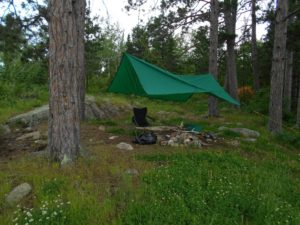
A tarp over a picnic table makes a great central gathering spot during rain.
Severe storms were forecast. Other than our tents, a tarp was the only shelter and we weren’t going anywhere soon. Since we had each taken a personal tent, we didn’t really have one tent to hang out in during inclement weather, so the gathering place was under the tarp.
Bottom line: we’d much rather be sitting out under a tarp than cooped up in a tent.
Here are some considerations for pitching a tarp (also called rain fly) and meeting the challenges presented by relentless wind.
Tarp shape
There are basically two shapes – square and rectangle. OK, there are also some funky batwing looking things floating around, too. You won’t know what works until you get one and learn how to pitch it. Just in case, I have three or four of each.
Tarp size
Bottom line: The bigger the tarp, the more dry area you have. And, the bigger the tarp, the heavier it is. Heavier material is generally stronger, but it’s also heavier.
Consider the kind of trip, expected weather, mode of travel, and priorities. How many people/how much stuff do you have to cover? What’s more important area coverage or weight? There are hundreds of different types and materials – not to be covered here.
Remember the splash/blow-in zone around the edges? The higher you pitch the tarp, the larger this zone is. For practical purposes, unless the tarp is right down on the ground, figure on a wet zone of two feet.
The basic tenant is people always choose a tarp that is too small. Remember, the area around the edge is a splash/blow-in (or wet) zone that is always wet in a rain storm and even worse in a high wind.
I have two “go-to” tarps. Both are taffeta nylon, which is heavier than rip-stop but stronger. One is 12’x12’ and the other is 12’x16’ – I use the 12’x16’ the most. I’m looking for a larger one, but I’m not going to pay $400 for it.
I consider 12’x12’ the absolute minimum for two people and have often taken my 12’x16’ on solo trips. It’s a great comfort when the weather turns bad and you’re going to spend a lot of time under it.
The camp site
During summer, when bugs are a major consideration, I try to camp on a point that is pointed into the wind coming across the lake. Of course, the minute you get set up in such a campsite, the wind will switch. Don’t bother to change campsites, because you know what will happen – again.

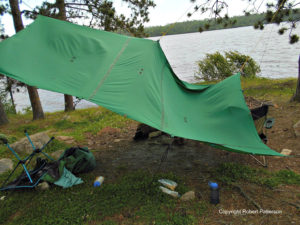
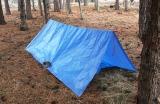
Pitch the tarp into the wind, or it may “kite.”
In a perfect world, after finding the perfect campsite, the tarp would be pitched so the edge into the wind can be lowered next to the ground, which also slopes away from the tarp toward the lake. This arrangement will minimize the wet zone on the windward side. It will keep the wind from blowing under the tarp and or causing the tarp to “kite”.
The more movement as the tarp blows around, the more likely it will be damaged or come down. A tight tarp is a stable tarp, and a lot more comfortable to be under. This set-up also keeps the rain draining away from the tarp rather than running underneath it and through your living area as it would if it drained on the uphill side.
To make this picture easier to see: Both the land and the tarp are slanted downhill toward the lake and the wind is coming in off the lake.
Pitch it high / Pitch it low
Pitching a tarp high will give good head room and room to move around. In a wind, it will also allow the wind to catch the tarp causing it to “kite” or billow up like a parachute. This works well on a balmy day where you’re mostly using the tarp for shade and the wind isn’t too strong.
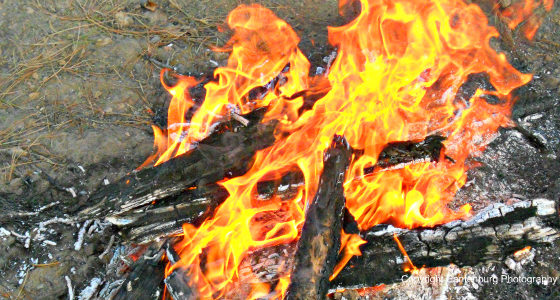
If you pitch the leading edge into the wind low, the wind will drive the tarp down. This is best for inclement weather when you are trying to keep yourself and your stuff dry. It doesn’t work well over a fire.
Remember the splash/blow-in zone around the edges? The higher you pitch the tarp, the larger this zone is. For practical purposes, unless the tarp is right down on the ground, figure on a wet zone of two feet.
In a really kicking storm, I like to stake the leading edge right down to the ground, or even lay a log on it. Hence eliminating what is usually the largest wet splash/blow-in zone. .
.
Drainage
The tarp has to drain. Pitch it flat and it will “pond” – water will collect in a big puddle in the tarp. The weight of the water may cause the tarp to rip or come crashing and splashing down.
Support poles keep the center from pooling with water or snow.
In your campsite management, try to designate a drainage area. Preferably away from the area you and your campmates will be occupying and make that the low area of the tarp. Both terrain contours and the wind should be considered in making this decision.
Other methods of controlling drainage and interior room include mid-tarp supports. The dark tabs in the middle of the tarp are for tying extra support ropes to. By raising specific parts of your fly, you can eliminate ponding areas and address wind issues. The use of topside cords on the tarp keeps the underside area clear and open for use.
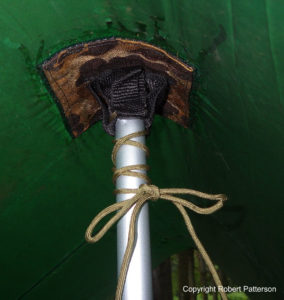
This patch allows the support to move with it, eliminating the need to reset it after heavy gusts.
Another method is using a support pole underneath the fly. Of course, having a pole in the middle of things under the tarp puts some limitations on the use of the area. The other consideration is the tarp material, as poles tend to wear and sometimes even poke holes in the fabric. Wear patches work very well to protect the tarp material.
In conjunction with the patch I sewed on a couple of loops of climbing web in an “X”, and a cord run through the ends of the loops. A pole end is placed in the middle of the X, the ends of the web are folded over the end of the pole, and the cord ends are tied around the pole. If the wind is strong enough to pick up the tarp, the pole will be picked up with it instead of just falling down and needing to be reset. When the fly settles back down, the pole will automatically be set back in place.
When sewing patches and tie tabs on your tarp, be sure to place a backup piece on the underside for strength. During the height of a storm in BWCA, the main tie tab on my tarp ripped right out taking a chunk of the tarp fabric with it. This creates a great deal of excitement for about five seconds. Unbeknownst to me at the time, the tab had only been sewn to the tarp material and not through the bottom patch.
Rigging
There are hundreds of configurations to pitch a tarp in. These can be covered in another article. I typically use the standard “A” frame configuration, or some variation, for 95% of my use.
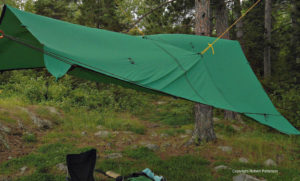
This pitch has the best of all worlds – amount of protected area, strength, and versatility. The best advantage is it can be changed from fair weather to storm mode very quickly and altered in the middle of a storm to accommodate changing conditions. I avoid pitching a fly in diamond configuration – that is tying the corners to the main trees and out to the sides. In my experience this form will give you the least usable room and peripheral coverage from storms.
Determine your rigging in advance. If you pitch a tarp for fair weather, also figure out a configuration for storms. Often you have very little time to “baton down the hatches” when weather turns sour. You will notice a lot of cords just hanging around in some of the pictures. Those are ready for switching to storm mode.
Any point that gets tied “UP”, should also get tied “DOWN” when you’re expecting high winds. Any cords tied to a point on the tarp that will be above your reach when the fly is raised, will have to be in place before the tarp is raised – plan ahead.
The “A” frame pitch can also be flipped over itself and out the way when not needed. If the tarp is over your fire pit, half of it can be flipped out of the way when you want to have a fire. Holes burned in the tarp create their own problems.
This method also works when the wind get too severe. Simply flipping half of it over the other will allow you to leave the tarp rigged up, and give the wind a lot less area to work on.
Finding two trees the right distance apart can be a real challenge!
I guess I failed to mention the most important consideration when pitching a fly – the position of available trees. Two for the center ridge, and one 45 degrees off of each corner doesn’t happen very often – or ever. You’ll just have to figure out how to use what Mother Nature gives you. (Are you getting the idea that this process involves a whole lot of insight, foresight, creativity, imagination, and innovation?) But, at a bare minimum it’s best to have two good trees with usable branches.
The ridge line is the main support. It can be two cords tied to center grommets on opposite sides of the tarp, one cord stretched all the way across between two trees with the tarp thrown over it, or cords used to support a ridge line pole which actually supports the tarp. Tying to the two center grommets is kind of self-explanatory, as is throwing the tarp over a ridge pole hung between two trees.
When using a continuous ridge line, the fly can be held in place with prusiks placed on each side of it. A prusik is a loop of cord tied on to another line. When the loop is pulled on it will bind and hold, and when the knot portion is pulled it will slide on the line it is tied around. (Find a climbing book because there’s no room to do a knots class here.) A fly connected in such a manner can be slid back and forth on the ridge line and secured into the desired position without having to jockey the main ridge lines and retie them each time, as on using two lines on the center grommets. It also makes it easier to position the tarp around the fire. (The left end of the “S” clip link would get clipped to the tarp.)
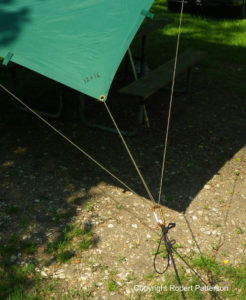
Use this setup to keep individual grommets from ripping out in heavy wind.
Take a good climbing or rescue class and learn some proper knots. Unless you already have a good working knowledge of knots, books will be of limited value in expanding your horizons. If the wind is high, your rigging will get jerked around to the max and you’ll soon learn if you did it right. All knots should be finished with a quick release, which means you push a bight through to finish it rather than the plain working end. When it’s cold, or rainy, or both, the quick release allows you to quickly untie the knot with one pull rather than picking at it in adverse conditions.
Which takes us to the rigging for the corner of the tarp. I didn’t invent this method, I just adapted some climbing techniques for a different purpose. I use a self-equalizing anchor which spreads the stress out over three grommets rather than putting it all on the corner grommet.
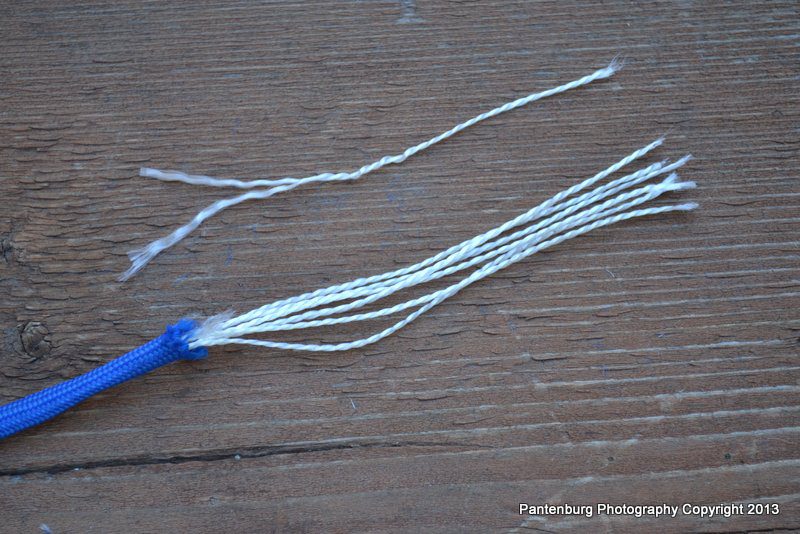
Take about 8 – 12 feet of paracord and tie one end to the grommet adjacent to the corner. Pass the other end of the cord through the corner grommet and tie it to the next adjacent grommet. There will be two loops between the three grommets. Put one loop over the other and clip them together with a carabiner. (I use cheap keyring type carabiner found in any hardware store.) The carabiner is then tied to an anchor. This rigging can slide back and forth allowing for a directional pull that isn’t exactly in-line with the corner.
When choosing an anchor for high wind, look for something that is “bomb proof”. That is, if a bomb goes off next to It, it will still be intact. You may be in trouble, but the anchor will hold. Due to the amount of jerking around the tarp gets in a high wind, tent stakes are often pulled out rather quickly. Digging a little hole under a tree root works well.
Take what works for you, master it, and make it yours.
Happy camping!
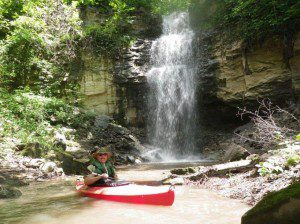
Bob Patterson kayaking at a waterfall on the Blue Earth River, Minnesota.
Robert Patterson is on my short list of people to go into the wilderness with. Bob is a skilled outdoorsman, an avid deer hunter, and for more than two decades, has done an annual solo, two-week canoe trip in the Boundary Waters Canoe Area Wilderness.
His career choices make Bob a great guy to review gear. A retired firefighter and first responder, Bob was also an EMT, and his job required he be out in all sorts of nasty, cold Minnesota weather. (Bob knows his foul weather gear and is my go-to guy for questions about winter camping, rain gear or other survival clothing !)
Bob is also a retired member of the National Ski Patrol, and a certified rope rescue instructor.
Check out these five tarp tips.
And learn more about building and improvising emergency shelters.
Please click here to check out and subscribe to the SurvivalCommonSense.com YouTube channel – thanks!

Leave a Reply