
A source of light during a power outage is really important. And a good way to acquire a reliable lighting source and save money is to look for used gas lanterns at thrift stores and garage sales. Here are some things to check the lanterns for.
by Leon Pantenburg
")
These green Coleman gas lanterns were given to me, and the red one came from a thrift store. They all work well after a little work. (Pantenburg photos)
Old Coleman mantle lanterns show up frequently at garage sales or in thrift stores. Sometimes, a thorough cleaning or very minor repair will fix one.
In other cases, the gasoline model may have been gotten rid of when the owner decided to upgrade or change over to propane. The savvy shopper may get a good deal, if he knows what to look for.
I am not a particularly good tinkerer, but hate giving up on good equipment.
So when I was given three grungy, dirty Coleman vintage camping lanterns, I tried fixing them. One ended up being thrown away, but the other two are now fully functional. My most recent acquisition, a model 200A single mantle, was bought for five dollars at the local Restore. All it needed was a new mantle.
If I can fix a lantern, so can you! There are several sites that explain how to trouble shoot problems, and Coleman still carries a full line of most repair parts. (Proceed with caution!!! Check out this link for safety tips before trying to fix any gasoline lantern!)
So suppose you come across a likely-looking lantern at a garage sale or thrift store. Here are some things to check out before buying it.
Check visually for leakage: If there is a noticeable crack or hole in the tank or around the fittings, don’t buy the lantern. If it is an obvious antique, it may be worth the money to buy another tank. But if you’re looking for a working lantern, buying a replacement tank may not make sense .
Try the controls: Do the knobs turn easily?

See if the controls move easily, often, the only problem is that dirt or dust has accumulated and keeps the knobs from turning.
Unscrew the fuel cap and check out the tank: An accumulation of varnish and crud can mean a tank needs to be flushed and cleaned.
Work the pump: It should move back and forth easily and build up pressure.
Check the fuel tank cap: Sometimes all the lantern will need is a cap that seals. Replacements are easily found on the Coleman website
Pressurize the tank: Then open the valve and listen. If you can hear a slight hissing, that probably means the lantern will work.
Is the globe cracked or missing? Replacements are easily found, but that will add $10-$12 to the cost of the lantern.
When you get home with your new old lantern, here’s what you can do.
Be careful: Gasoline is explosive, so use caution and proceed with care.
Clean it up: Take a hose and brush and scrub off all the dust, cobwebs, fly poop and assorted crud that has accumulated. My vintage 228E double mantle model had hung in an old building for probably 30 to 40 years. It literally had a half-inch of dust all over. After a good exterior scrubbing and drying out, and a tank rinse with denatured alcohol, a new globe and mantles were all it took to get the lantern working again. It looks really cool when it’s lighted!
Lubricate the pump: Frequently, all that is not working is the pump. If the lantern has not been used in a while, the

Try the pump. Twist it counterclockwise, then pump it about 20-30 times. If the leather cup is dry, no pressure will build up.
leather cup may be dried out. Try the pump handle – if no resistance has built up after about 20 strokes, that might mean the cup dried out. A drop or two of light oil may be all the lantern needs. Otherwise, a new pump will cost about $10 at WalMart.
Clean the tank: Varnish can accumulate in a tank if the lantern has been stored with fuel in it. One recommendation is to fill the tank with denatured alcohol, and let it sit for a while. Depending on the varnish accumulation, that should dissolve the crud. Rinse thoroughly with more alcohol and let it dry with the cap off before filling and using.
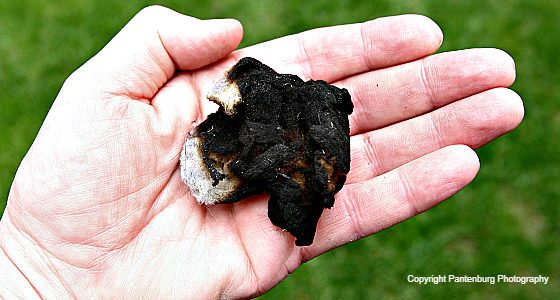
Put on new mantles: This sounds simple, but in some cases, a user might have botched this very simple task and the lantern didn’t work. Any mantle with a hole or tear should be replaced, even if the lantern works with it.
If these activities don’t make the lantern functional, you may need to disassemble it completely and do a better interior cleaning.
Don’t experiment with safety features and don’t get discouraged. There are several Coleman lantern collectors’ websites and parts, even for the oldies, are available.
Check out these sites for parts, dis-assembly instructions and restoration tips:
http://www.oldtowncoleman.com/
Please click here to check out and subscribe to the SurvivalCommonSense.com YouTube channel – thanks!

Order your copy now on Amazon!

Support your local book store!

Michael Szczepanski
I have had stuck check valves in the past and invested in a check valve removal tool. I work on other peoples lanterns so it was a good investment. I like to tinker and as I have gotten older I like the easier things to work on. These are some of the easiest things to fix. A stuck check valve is very easily removed with the wide or narrow tool. After I get it out I spray some gunk remover and use an old glass and fill it half with white vinegar and a tablespoon of salt and put it in the microwave for a minute or until it boils. I take it out and let it cool and remove the check valve and try to blow and suck air through the valve. If I can It needs a brushing with a wire brush but usually the vinegar does the trick. I used to boil parts in a large pot but the vapors fill the house making it hard to breath. I just scaled it down. I check the fount with a magnet and if any metal clings I pour BB’s in the empty fount and keep rotating it with one hand and then pour the BB’s into another old glass to see if the fount is rusting. which means the rust will clog the pick-up when in use, I keep repeating until the BB’s are clean. I pour a little white gas in and swirl it and pour it into a glass to see if it is clean. I meant to say I also remove the pick-up tube that goes into the fount. I found no special tool is needed to remove this. I had a very hard time using a vice and turning the fount with my hands, I put on leather gloves and got a better grip and remember the top of the fount turns toward you will loosen it. Everything clean I start putting it back together. Starting with the pickup and blue loctite and leave it set. Put everything back in reverse from the way you took it apart. If you are unsure tape letters or numbers on the parts as you go. I learned the hard way by putting the cage on and forgetting the bottom cage holder.